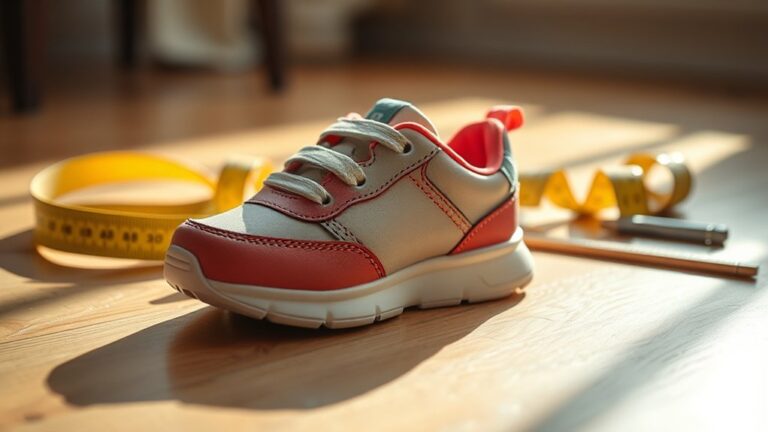
How To Use Shoe Goo – Application Tips And Instructions
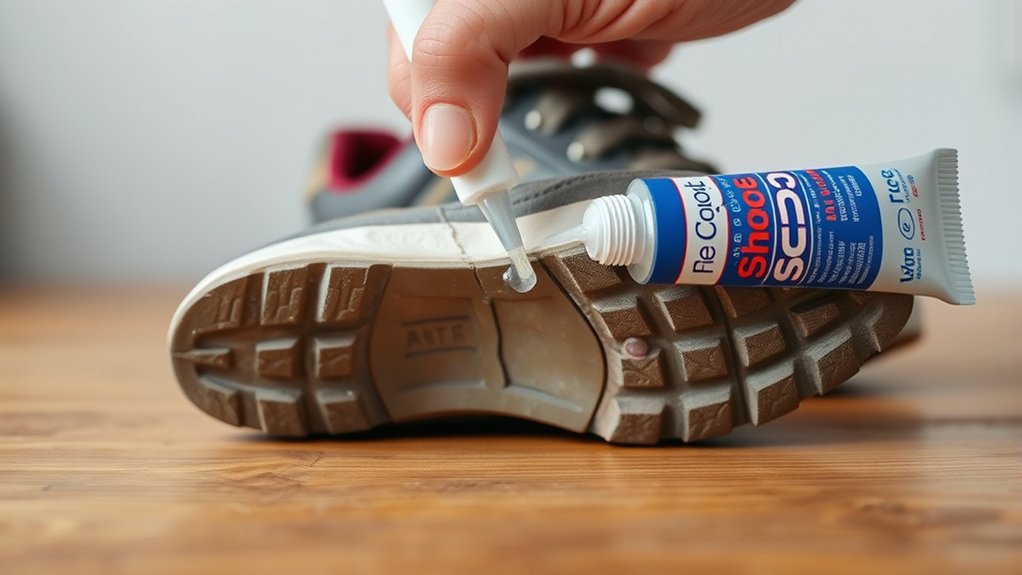
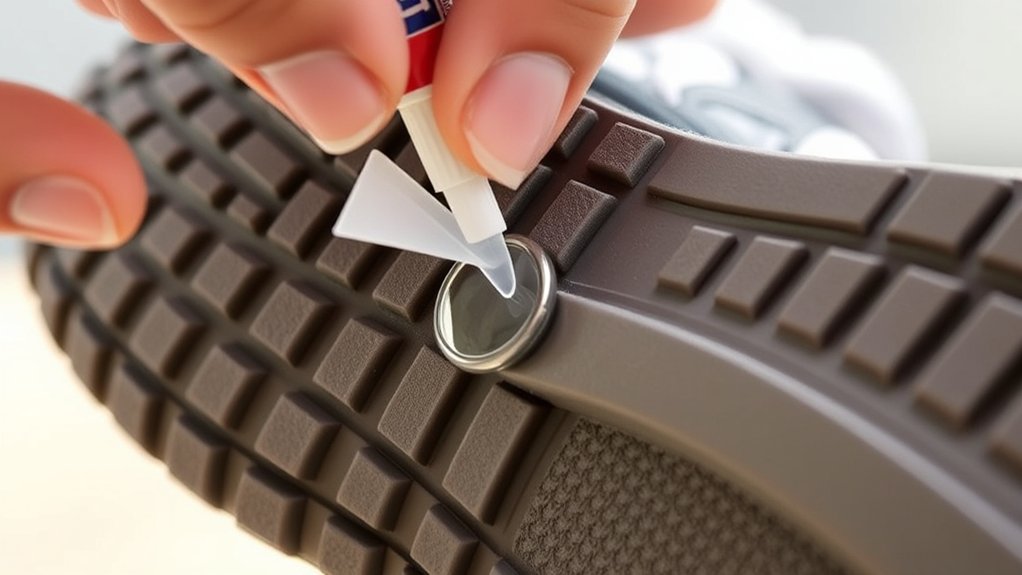
To use Shoe Goo effectively, start by cleaning and roughening the shoe surface for better adhesion. Apply a thin, even layer on both parts, then let it become tacky before pressing them together.
Use gentle clamps or bands to hold the pieces securely while curing in a warm, dry spot for 24 to 72 hours. Avoid water and stress until fully cured.
Proper preparation and curing are really important. Understanding these steps will help you get durable, flexible repairs. There’s actually more to mastering this process if you want the best results.
Key Takeaways
- Clean and dry damaged shoe areas, then roughen surfaces with sandpaper for better Shoe Goo adhesion.
- Apply a thin, even layer of Shoe Goo on both surfaces and let it become tacky before bonding.
- Use gentle clamps, elastic bands, or clips to hold parts securely during the 24–72 hour curing time.
- Cure repairs in a warm, dry environment and avoid water or stress until fully set.
- After curing, inspect the repair regularly and reapply Shoe Goo if lifting or cracking occurs.
Why Shoe Goo Works Great for Fixing Shoes
Because Shoe Goo is engineered to withstand the unique stresses footwear endures, it forms a strong, durable bond that resists flexing and abrasion. You’ll appreciate its flexible, shock-absorbing properties that move naturally with your shoe, preventing cracks or breaks during use.
Shoe Goo creates a durable, flexible bond that absorbs shock and resists wear, keeping your shoes intact.
The adhesive sticks effectively to rubber, leather, canvas, and synthetics, so it’s super versatile. Plus, its waterproof formulation keeps the bond strong even in wet conditions.
Shoe Goo’s special formula seals and rebuilds worn areas, helping prevent premature wear. When you’re applying it, you can choose formulations with color matching options to blend repairs seamlessly with your shoe’s original look.
On top of that, its low-odor formula makes the repair process more pleasant. All these things combined—durability, flexibility, and attention to how your shoes look—make Shoe Goo a great choice for fixing shoes.
Gather Tools and Safety Gear Before Repairing
To maximize the effectiveness of Shoe Goo repairs, preparing your workspace and gathering the right tools is a key step. Confirm shoe material compatibility to avoid damage. Use adhesive removal techniques like acetone or citrus-based solvents to clean surfaces before application.
Make sure to equip yourself with protective gear, such as nitrile gloves and safety glasses. Also, guarantee good ventilation to handle fumes safely.
| Tool | Purpose |
|---|---|
| Sandpaper (80–120) | Roughen surface for better bond |
| Masking Tape | Protect adjacent shoe areas |
| Small Spatulas | Precise adhesive application |
Use elastic bands or bulldog clips for clamping during curing. An old toothbrush helps clean the shoe, which guarantees optimal adhesion and repair durability.
When Not to Use Shoe Goo for Repairs
You shouldn’t use Shoe Goo on porous materials like fabric or untreated leather because it just won’t stick properly.
Also, if your shoes have major structural damage, it’s best to get them professionally repaired or replaced instead of trying to fix them yourself.
And don’t forget—if the surface is dirty, wet, or has been exposed to extreme heat, you should avoid using Shoe Goo. Those conditions make it hard for the glue to bond the way it needs to.
Unsuitable Materials
Although Shoe Goo offers versatile adhesive properties, it doesn’t bond effectively with certain materials, which limits its use in some repairs. You should avoid applying it on low energy plastics like polyethylene (PE) and polypropylene (PP) because they resist adhesion.
Similarly, water repellent fabrics prevent proper bonding due to their surface coatings. Materials containing silicone and crumbling midsoles also pose challenges. Non-porous surfaces like glass or smooth metals require roughening or priming before application to guarantee a strong bond.
| Material Type | Reason for Unsuitability | Recommended Action |
|---|---|---|
| Low energy plastics | Poor adhesion | Use specialized adhesives |
| Water repellent fabrics | Coating blocks bonding | Avoid use |
| Silicone-containing | Highly resistant to bonding | Do not apply Shoe Goo |
| Crumbling midsoles | Lack of structural stability | Replace midsole before repair |
| Non-porous surfaces | Weak bond without surface prep | Roughen or prime surface first |
Irreparable Damage Types
When structural damage compromises the sole or midsole’s stability, Shoe Goo won’t restore the necessary safety or support. You should avoid using it on irreparable damage such as large holes, extensive tears, or broken internal support structures like insoles or shanks. These issues require component replacement rather than adhesive repair.
Also, Shoe Goo doesn’t work well on unsuitable materials, including non-porous plastics or coatings. The bond may fail under stress or when exposed to moisture.
Severely crumbling or deteriorated shoe materials are another problem since the product can only mend surface-level damage.
Knowing these limits helps you avoid relying on Shoe Goo when structural integrity is compromised. This way, you prevent ineffective repairs and potential safety hazards.
How to Prepare Your Shoes for Repair
Before applying Shoe Goo, thoroughly preparing your shoes guarantees ideal adhesion and a durable repair. Start by cleaning the damaged area with soap and water, removing dirt and grease, then dry it completely.
Next, assess shoe material compatibility by testing a small amount of Shoe Goo on a hidden spot, especially if you’re using tinted glue. It’s a good idea to make sure the glue will work well with your shoes before you commit.
Try surface preparation techniques like roughening the area with 80 to 120 grit sandpaper or a wire brush to help the glue bond better. You can also mask off nearby edges with painter’s tape to keep the repair zone clean and prevent excess glue from spreading.
Finally, make sure your shoe is in a warm, dry environment to promote proper curing and adhesion. Following these steps really helps Shoe Goo work its best for a long-lasting fix.
How to Apply Shoe Goo for Best Results
Since clean, dry surfaces guarantee the strongest bond, you should thoroughly remove any dirt or grease before applying Shoe Goo. Proper surface preparation is vital for adhesion and longevity.
Next, select a Shoe Goo color that matches your shoe to guarantee a discreet repair. Apply a thin, even layer of adhesive to both surfaces using a small spatula or brush. Allow the layer to become tacky, as this enhances bonding strength.
Avoid excessive application because it can cause uneven curing or mess. Once tacky, press the parts together firmly. This precise application technique maximizes the repair’s durability and aesthetic integration.
How to Clamp and Hold Shoes When Using Shoe Goo
To make sure you get a strong bond when using Shoe Goo, it’s important to apply steady pressure with the right tools. Things like clamps, elastic bands, or bulldog clips work great for this. Just pick holding devices that spread the force evenly so you don’t end up bending or warping your shoe, especially if you’re working with curved or larger areas.
You’ll want to keep those clamps or bands secure for the entire curing time, which can be anywhere from 24 to 72 hours. It’s a good idea to check on them now and then to make sure everything is staying in place and the shoe parts are staying tightly pressed together.
That way, you’ll get the best, longest-lasting bond possible.
Effective Clamping Techniques
Although applying Shoe Goo correctly is vital, how you clamp and hold your shoe during the curing process really impacts the repair’s durability. Effective clamping techniques make sure there’s consistent pressure across the repair area. This is key for the adhesive to work its best.
Use clamps, elastic bands, or bulldog clips to keep firm contact right after spreading the adhesive. This helps get rid of air pockets and makes the bond stronger. You’ll want to position clamps on spots like the toe, midfoot, and heel.
Just be careful with the pressure so you don’t deform the shoe or cause uneven adhesion. Keep the clamps on for the full curing time, which is usually between 24 to 72 hours. Doing this will help you get the strongest, longest-lasting repair.
Proper clamping really guarantees a secure fix by boosting Shoe Goo’s bonding power. It’s one of those simple steps that makes a big difference!
Choosing Proper Holding Tools
Applying consistent pressure with the right tools guarantees Shoe Goo cures evenly and bonds strongly. When choosing proper holding tools, prioritize material compatibility to prevent damage or marks on the shoe surface. Use clamps designed for gentle pressure, avoiding overtightening that can deform the shoe or cause uneven bonding.
For smaller repairs, elastic bands or small clips provide secure, non-invasive holding. Focus your clamping techniques on critical zones like the heel, midfoot, and toe to ensure uniform adhesion.
Always verify that your tools maintain steady pressure without leaving indentations once the adhesive cures.
Shoe Goo Cure and Dry Times
How long does it take for Shoe Goo to reach its full strength? The curing process is critical to guarantee a durable repair. Typically, Shoe Goo takes about 24 hours to reach a tacky finish, but you’ll want to wait up to 72 hours for maximum strength.
Shoe Goo reaches a tacky finish in 24 hours, but full strength requires up to 72 hours.
Proper application timing and environmental conditions influence curing speed. Here’s what to consider:
- Initial tacky cure occurs around 24 hours.
- Optimal bond strength develops between 48 to 72 hours.
- Applying low heat or placing the item in a warm, dry area can accelerate curing.
Avoid handling or exposing the repair to water before full cure to maintain waterproof integrity. Understanding these cure and dry times helps you achieve the strongest, most reliable Shoe Goo bond.
Fixing Common Problems When Using Shoe Goo
Once you’ve allowed Shoe Goo to cure properly, you might still encounter issues that compromise the repair’s durability or appearance. Common problems include edges lifting, hazy patches, or weak bonds.
To fix these, reassess your surface preparation. Make sure all surfaces are thoroughly cleaned, degreased, and lightly roughened. This step is essential for proper adhesion.
If you notice poor wetting or white haze, degrease again and lightly sand or apply a primer to improve bonding. Use thin, even coats and press parts together only when tacky to avoid weak spots.
For cosmetic concerns like color matching, carefully blend Shoe Goo with paint or dye after curing.
Finally, keep the environment warm and dry during curing and clamp repairs with appropriate pressure to prevent deformities or rubbery textures.
Caring for Shoes After Repair With Shoe Goo
Why is proper care essential after repairing your shoes with Shoe Goo? Proper care ensures the adhesive fully cures, which helps maintain durability, flexibility, and waterproofing. It’s all about keeping your repair strong and your shoes looking great.
Proper care lets Shoe Goo fully cure, ensuring durable, flexible, and waterproof repairs that keep your shoes strong and stylish.
Follow these steps to protect your repair and preserve shoe aesthetics, including shoe color matching and sole replacement options:
- Allow the repaired area to cure for 24 to 72 hours in a warm, dry place. This prevents moisture from weakening the bond.
- Try to avoid water or putting stress on the repair during this time.
- After curing, gently clean the repair with a damp cloth. This helps remove any residue without damaging the adhesive or affecting the color match.
- Regularly check for any lifting or cracking. If you notice any, just reapply Shoe Goo to reinforce the repair and keep it waterproof.
This is especially important if you’re thinking about sole replacement options.
Taking consistent care like this will help your repair last longer and keep your shoes looking and working like new.
Frequently Asked Questions
Can Shoe Goo Be Used on Materials Other Than Shoes?
Yes, Shoe Goo offers excellent material compatibility beyond shoes. You can use it for alternative uses like repairing wetsuits, rubber boots, and sports gear. It ensures flexibility and durability across rubber, leather, canvas, and synthetic fabrics.
Is Shoe Goo Waterproof After Curing?
Yes, Shoe Goo’s waterproofing properties activate immediately but reach full strength only after the curing process, which takes 24 to 72 hours.
You should wait for complete curing to guarantee maximum water resistance and durability. This way, you’ll get the best results and keep your shoes protected longer.
How Long Does Shoe Goo Remain Flexible After Application?
When it comes to flexibility retention, Shoe Goo keeps you covered for about 24 to 48 hours after application, based on durability testing.
Full curing, which maximizes flexibility, usually finishes within 72 hours under ideal conditions. So, give it some time to set, and you’ll get the best results.
Can Shoe Goo Be Painted Over Once Dried?
Yes, you can paint over Shoe Goo once it’s fully cured. For the best results, start by lightly sanding the surface first. This helps the paint stick better.
Make sure to use paint that’s compatible with Shoe Goo. After painting, apply a clear topcoat. This step improves durability and ensures the paint lasts longer.
What Is the Shelf Life of an Unopened Shoe Goo Tube?
The shelf life of an unopened Shoe Goo tube is typically 12 to 24 months. You should store it in a cool, dry place to keep it working well. This helps prevent the adhesive from hardening and losing its stickiness.
Keeping it stored properly really makes a difference. So, find a spot that’s not too warm or humid. That way, your Shoe Goo will be ready to use whenever you need it.
Conclusion
Think of Shoe Goo as the bridge-builder for your footwear. Carefully laid, it reconnects broken paths with strength and resilience. By preparing your shoes thoroughly, applying the adhesive precisely, and allowing proper curing time, you create a durable link that withstands daily wear.
Avoid shortcuts. Just like a sturdy bridge needs solid foundations, your repair needs proper care. Follow these exact steps, and your shoes will regain their footing. They’ll be ready to carry you confidently forward.