What Is Shoe Molding – Purpose And Installation Guide
Shoe molding is the narrow, curved trim you install where baseboards meet the floor to hide gaps and protect walls from damage. You’ll measure carefully, cut corners at 45°, then nail it close to the baseboard for a polished finish. It’s great for smoothing uneven flooring edges.
You can paint or stain it, and replace it if damaged. Keep following to master choosing materials, cutting, and finishing for flawless results.
Key Takeaways
- Shoe molding is a narrow, curved trim installed at the base of baseboards to cover gaps and imperfections between walls and flooring.
- It protects baseboards from damage caused by vacuum cleaners, shoes, and mops while enhancing room aesthetics with a polished finish.
- Shoe molding differs from quarter round by being slimmer and less prominent, suitable for modern or transitional styles.
- Installation involves measuring, cutting at 45° angles, fitting corners precisely, and nailing the molding securely to the wall base.
- Finishing steps include painting or staining, caulking gaps for a seamless look, and replacing molding when damaged or outdated.
What Is Shoe Molding and Why Use It
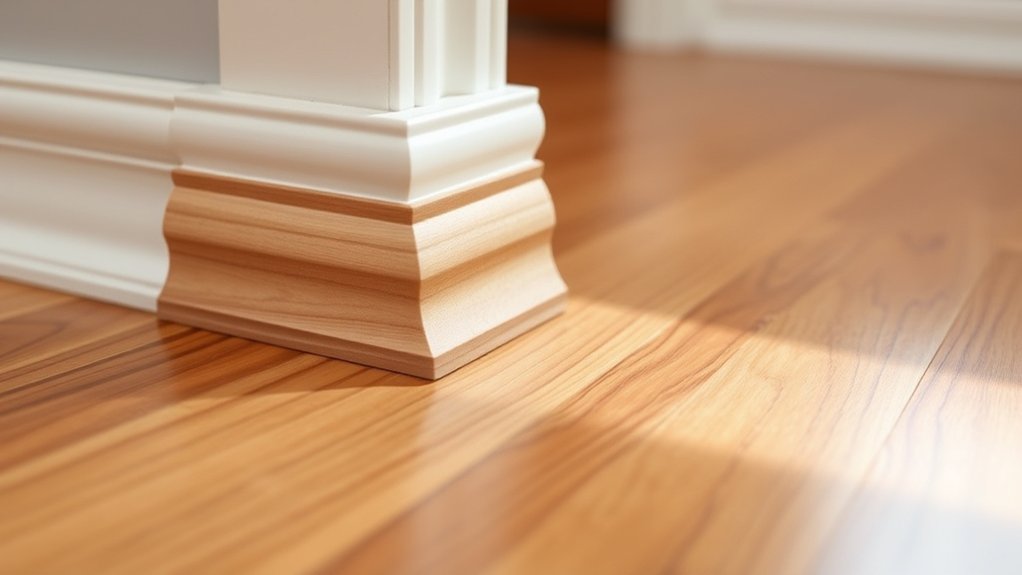
What exactly is shoe molding, and why should you consider using it in your space? Shoe molding is a narrow, curved trim installed at the base of your baseboards. It’s designed to create a seamless connection between your walls and flooring.
Historically, it’s been an essential finishing touch that reflects cultural variations in interior design, emphasizing both function and style. You’ll find it hides gaps, uneven surfaces, and imperfections where the wall meets the floor.
Beyond aesthetics, shoe molding protects baseboards from damage caused by vacuum cleaners, shoes, and mops. It’s a simple, affordable way to give any room a polished, professional look while preserving your walls and floors.
Considering its practicality and historical significance, shoe molding is a smart addition to your home’s finishing details. It really makes a difference you’ll appreciate every day.
Shoe Molding vs. Quarter Round: What’s the Difference?
How do you choose between shoe molding and quarter round for your space? Understanding their differences helps.
Choosing between shoe molding and quarter round starts with understanding their distinct styles and functions.
Shoe molding is narrower and more delicate, with a slim curved profile that complements modern or transitional interior design. It sits close to the baseboard and floor, providing a subtle transition and adapting well to uneven surfaces.
Quarter round, in contrast, is thicker with a bold quarter-circle shape, popular in more traditional settings due to historical trends. It covers larger gaps and creates a more pronounced decorative element.
If you want a refined, less noticeable finish, shoe molding is your best bet. But if you prefer a sturdier, more prominent look that emphasizes the floor-to-wall transition, quarter round suits that purpose better.
Both serve practical roles but cater to different style preferences. So, think about the look you want and the gaps you need to cover before making your choice.
Choosing the Best Material for Shoe Molding
When you’re picking out shoe molding, it’s good to think about the material in relation to the conditions of your room. Wood is a great choice if you want that classic look and something durable—just keep in mind it works best in dry areas.
If you’re on a budget, MDF is a solid option. It’s easy to paint and fits well with most interior styles.
Now, for places that tend to get damp, like bathrooms, you’ll want to go with PVC or vinyl. These materials stand up to moisture much better and will last longer in those conditions.
Material Types Overview
Why choose one type of shoe molding material over another? It all depends on your priorities.
If you want to match historical styles, hardwoods like oak, maple, or cherry are perfect. They can be stained or painted to blend seamlessly with traditional interiors.
For a budget-friendly, smooth surface that’s easy to paint, MDF works well, especially in modern settings.
PVC or vinyl shoe molding stands out for moisture resistance. It’s ideal for damp areas like bathrooms and basements.
Composite materials offer a balance. They resist warping, look like wood, and are customizable.
If eco-friendly options matter to you, consider sustainably sourced wood or composites that minimize environmental impact.
Ultimately, your choice hinges on finish preference, room conditions, and budget.
Room-Specific Material Choices
Where should you install different types of shoe molding to get the best results? In moisture-prone areas like bathrooms and basements, choose PVC or vinyl shoe molding for their water-resistant properties. These materials hold up well and prevent damage.
For living rooms and bedrooms, opt for wood or MDF shoe molding. MDF is cost-effective and offers a smooth surface perfect for painted finishes. Hardwood adds durability and can be stained to match your flooring.
Both materials serve as excellent decorative accents, especially if you want to echo historical styles in your home.
When selecting materials, consider room humidity, moisture exposure, and your desired aesthetic finish. This will guarantee your shoe molding not only looks great but lasts long in its environment.
Best Places to Install Shoe Molding in Your Home
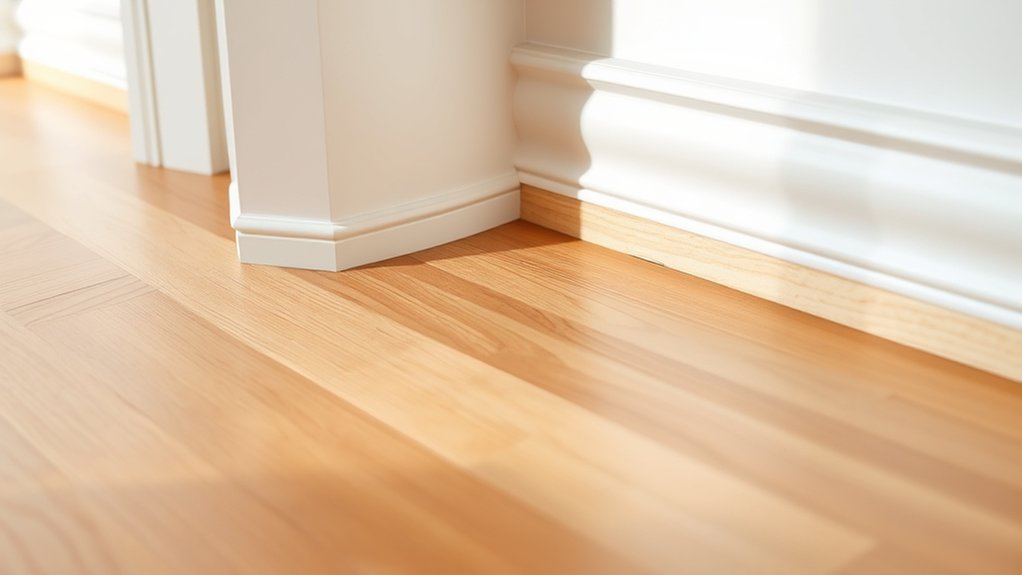
Although shoe molding can improve the look of any room, you’ll get the most benefit by installing it in key areas where gaps and uneven surfaces are common. Living rooms and hallways are prime spots, as shoe molding conceals gaps between floors and baseboards caused by uneven surfaces.
Shoe molding works best in areas like living rooms and hallways to hide gaps from uneven floors and baseboards.
In these spaces, you can even choose decorative patterns that echo historical styles to enhance your home’s character. Kitchens also benefit, with molding hiding small shifts around cabinets due to moisture and temperature changes.
Bathrooms require moisture-resistant materials like PVC or vinyl shoe molding for durability and a clean finish. Bedrooms gain a polished look while protecting baseboards from damage.
In basements, flexible shoe molding adapts to uneven concrete slabs, ensuring a seamless connection between surfaces throughout your home. It’s a simple upgrade that really pulls everything together.
How to Measure and Pick the Right Shoe Molding
To get the best results from shoe molding, you need to start by measuring your walls carefully to know exactly how much material you’ll need. Use a measuring tape to determine the total linear footage along each wall where the molding will go.
Next, pick a molding width and profile that complements your baseboards and fits the gap you want to cover. Consider decorative patterns or historical styles if you want to add character matching your home’s aesthetic.
Decide between unfinished or prefinished molding according to how much time you have for finishing. Also, choose the right material—wood for durability, MDF for affordability, or vinyl for moisture resistance—based on your room’s conditions.
Accurate measurements guarantee a smooth installation process. Taking your time here will save you a lot of hassle later on.
How to Cut and Prepare Shoe Molding for Installation
Start by measuring the full length of your wall carefully and marking the shoe molding accordingly.
Then, set your miter saw to 45° to make precise angled cuts for corners. This will help ensure a clean fit.
It’s a good idea to practice cutting on scrap pieces first to get comfortable with the miter angles before you work on your actual molding.
Measuring And Marking
When you measure each wall where the shoe molding will go, add an extra inch to your measurement for adjustments. This guarantees a precise fit, especially when working with decorative accents or replicating historical styles.
Mark your measurements clearly on the molding with a pencil, aiming for accuracy to avoid mistakes.
Label each piece, particularly around corners and doorways, to keep track of placement.
Before cutting, double-check your marks against the wall and baseboard to confirm the length.
Although cutting techniques come next, at this stage, focus on precise measuring and marking to prepare the shoe molding properly.
Taking these careful steps will help your decorative accents align perfectly and maintain the integrity of historical styles in your installation.
It’s all about setting yourself up for success right from the start.
Miter Cutting Techniques
After carefully measuring and marking your shoe molding, the next step is cutting the pieces to fit perfectly, especially around corners. Set your miter saw to a 45° angle for precise crosscuts.
For outside corners, angle the saw outward; for inside corners, angle it inward to ensure tight molding joint techniques.
Always observe miter saw safety by securing the molding firmly and wearing safety glasses. Cut just outside the pencil line to allow a snug fit once assembled.
Before making final cuts, practice on scrap pieces to confirm your angles and lengths.
For very tight inside corners, consider coping instead of mitering by cutting along the molding’s profile for a seamless joint. This approach improves both fit and finish.
It’s a handy trick that can really make your work look professional.
How to Install Shoe Molding: Step-by-Step
Although installing shoe molding might seem straightforward, precise measurements and careful cutting are essential for a professional look. Just like in furniture design, where historical trends influence every detail, shoe molding installation requires attention to detail to complement your room’s character.
Here’s how you do it:
- Measure the room’s perimeter accurately and cut molding with a miter saw at 45° angles for clean corners.
- Test fit each piece before nailing to ensure seamless joints, adjusting as needed.
- Attach molding to the baseboard using a pneumatic brad nailer, avoiding the floor.
- Fill nail holes and gaps with wood filler, then sand smooth for a flawless finish.
Following these steps guarantees your shoe molding enhances your space with a polished, timeless look.
Painting, Staining, and Caulking Shoe Molding
Once you’ve installed your shoe molding securely, the next step is to enhance its look and durability through painting, staining, and caulking. Start by applying a primer or stain-blocking primer to guarantee even color matching and prevent bleed-through.
If you’re staining, use a wood conditioner first to avoid blotchiness and maintain consistent texture contrast. After your paint or stain dries (usually 24 hours), apply caulk along the top edge of the molding. This fills gaps, improves adhesion, and creates a seamless connection between the molding and wall or floor.
Caulking also gives your project a polished, professional finish. Paying attention to these details not only protects your shoe molding but also elevates the overall aesthetic in a subtle, effective way.
When to Replace Your Shoe Molding and Why
If your shoe molding shows signs of damage like cracks, warping, or fits poorly due to shifts in the floor or wall, it’s time to replace it. Proper shoe molding maintenance helps avoid bigger problems down the line. Consider replacement when:
- You discover mold, rot, or pest damage after removing old molding.
- Regular wear has caused dents or chips affecting appearance.
- The molding no longer fits snugly due to structural shifts.
- You’re updating your room’s style or color and need a fresh look.
Performing a replacement cost analysis before starting helps you budget effectively, factoring in material and labor.
Timely replacement maintains your room’s polished finish and prevents safety issues. It ensures your home looks its best with minimal hassle.
Frequently Asked Questions
Can Shoe Molding Be Installed Over Carpeted Floors?
Yes, you can install shoe molding over carpeted floors by nailing it into the baseboard for carpet compatibility. This method offers aesthetic options that neatly hide carpet edges while keeping the molding secure and visually appealing.
It’s a simple way to give your room a clean, finished look without having to remove or alter the carpet. Plus, it helps protect the edges of the carpet from fraying or damage over time. So, if you want a polished appearance and practical solution, shoe molding over carpet is definitely a good choice.
How Do I Remove Old Shoe Molding Without Damaging the Walls?
Don’t just yank shoe molding unless you love wall damage! Score paint seals with a utility knife first.
Then, slowly pry the molding away using a putty knife. Tap gently to loosen it without causing harm.
After that, remove nails carefully using proper removal techniques. This way, you keep your walls looking pristine.
Is Shoe Molding Suitable for Outdoor Use or Only Indoors?
Shoe molding isn’t suitable for outdoor use due to limited outdoor durability. You’ll want to choose specific material options like vinyl or PVC with weather resistance. But even those may need extra protection against harsh weather conditions.
Can Shoe Molding Help With Soundproofing a Room?
You’ll find shoe molding offers modest soundproofing benefits by sealing gaps, reducing up to 20% of sound leakage. It enhances acoustic insulation when combined with dense materials, making your room quieter and more comfortable overall.
What Tools Are Essential for DIY Shoe Molding Installation?
You’ll need a miter saw for precise cuts on your molding material, a tape measure for accuracy, and a pneumatic brad nailer for secure fastening.
Mastering installation techniques like angle cuts and alignment guarantees a professional finish.
Taking your time with these steps really pays off, making your DIY shoe molding look sharp and polished.
Conclusion
Now that you know shoe molding helps cover gaps between your baseboards and floors, it’s worth noting that nearly 60% of homeowners use it to give their rooms a polished look. Installing shoe molding is a simple way to boost your home’s finish and protect edges from damage.
By measuring carefully and following the steps, you’ll achieve a clean, professional result that lasts. Don’t overlook this small detail. It makes a big difference.