How To Measure Shoe Size At Home – Accurate DIY Guide
To measure your shoe size at home accurately, start by placing your foot flat on sturdy paper and tracing it while standing and distributing your weight evenly. Mark the longest toe and heel points, then measure length and width with a ruler or tape measure.
Don’t forget to measure your instep girth for shoe depth. Use these figures with size charts or calculators, prioritizing the larger foot. It’s a good idea to follow up with fit tests to guarantee comfort.
Keep exploring detailed steps for perfect sizing to make sure your shoes fit just right.
Key Takeaways
- Place your foot firmly on taped A4 paper on a hard surface and trace around it with the pen held straight at a 90° angle.
- Measure foot length from heel to longest toe and width across the widest part using a ruler or tape measure in millimeters or inches.
- Measure instep girth by wrapping a flexible tape around the middle of the foot, recording the snug but comfortable circumference.
- Use the larger foot’s measurements with a reliable shoe size calculator and compare results against brand-specific size charts for accuracy.
- Verify fit by ensuring enough toe space, stable heel placement, and considering shoe depth, material flexibility, and arch support needs.
How To Prepare Your Foot And Tools For Accurate Measurement
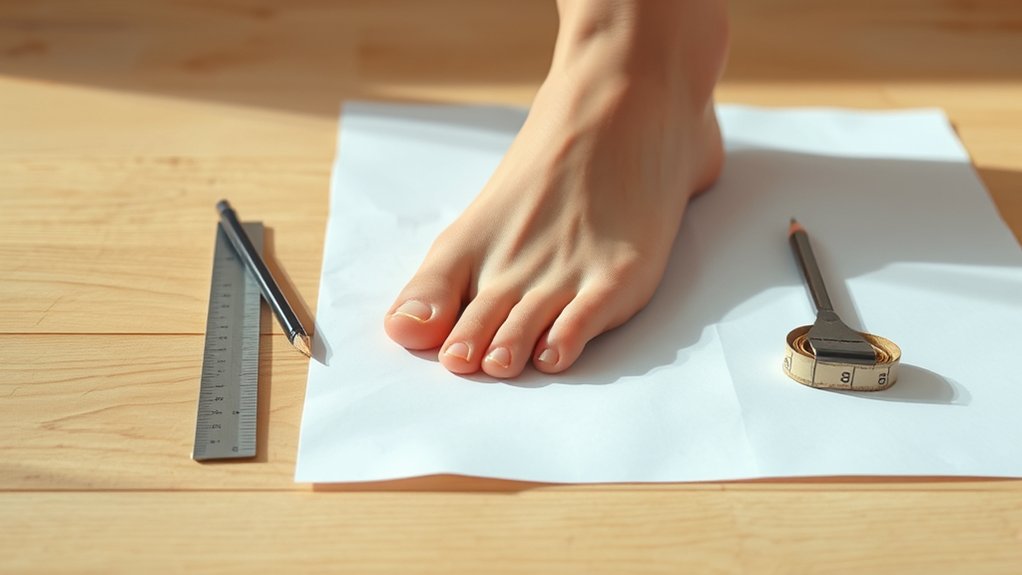
Before you begin measuring your shoe size, gather essential tools like a pen, tape measure, and a piece of A4 paper or a printable foot measuring template to guarantee accuracy. Place the paper on a hard, flat surface to prevent slipping during measurement.
Stand barefoot or wear socks that match the shoe material of your intended footwear fashion to reflect true foot size. Position your foot firmly and flat on the paper, with knees slightly bent or while sitting to maintain your natural foot shape.
Use the pen to mark the longest toe and heel points clearly on the paper. These careful preparations ensure your measurements accurately capture the foot’s dimensions, helping you select footwear that fits well and complements your style.
How To Trace Your Foot For Shoe Size Measurement
First, grab a clean, flat piece of paper and lay it down on a hard surface so it doesn’t move around.
Next, stand up straight and place your foot firmly on the paper, making sure your weight is evenly distributed to get the most accurate outline.
Then, take a pen and hold it straight up as you carefully trace around your foot, keeping the line close and steady.
Preparing Paper Surface
When you prepare the paper surface for tracing your foot, placing it on a hard, flat area is crucial to maintain stability. Secure the paper with tape to prevent slipping during your outline. Use a pen held at a 90-degree angle for accuracy, and guarantee you trace the heel, longest toe, and widest part of your foot.
This precision is essential for proper shoe size measurement, impacting both footwear fashion and shoe care.
| Step | Tip |
|---|---|
| Surface choice | Use hard, flat area |
| Paper securing | Tape edges to avoid movement |
| Tracing method | Pen at 90° angle for accuracy |
This setup ensures your foot outline is precise, helping you pick well-fitting, stylish shoes and keep them in good shape.
Foot Positioning Tips
Although tracing your foot might seem simple, proper positioning is key to getting an accurate measurement. Place your foot flat on the paper with your heel firmly against a wall or straight edge to guarantee stability. Stand naturally, distributing your weight evenly on both feet to capture your true foot size.
This is essential when selecting footwear that complements your foot shape. Hold the pen perpendicular at a 90-degree angle and apply consistent, firm pressure to avoid distorting the outline. Clearly mark the longest toe and the back of the heel to measure foot length precisely.
Accurate foot positioning ensures your measurements reflect the necessary space for shoe material flexibility and comfort. This helps you choose shoes that fit perfectly and support your style effectively.
Accurate Tracing Techniques
To achieve an accurate foot tracing for shoe size measurement, you’ll want to place your foot flat and fully supported on a piece of paper while standing upright. Hold your pen perpendicular at a 90-degree angle to avoid distorting the shape. Trace closely around your foot’s outline, capturing the true contours, including the foot arch, which affects fit and comfort.
Mark the tip of your longest toe and the back of your heel to set reference points for measurement. After tracing, use a ruler or tape measure to determine the distance between these points.
Remember, considering your foot arch and the shoe cushioning is essential when selecting shoes based on your tracing. This way, you’ll ensure a proper fit that supports your foot’s natural shape and provides adequate comfort.
It’s a simple trick that makes a big difference when shopping for shoes!
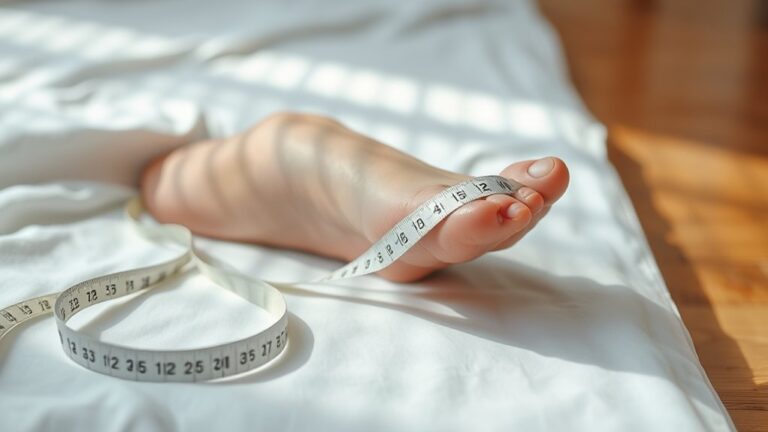
How To Measure Foot Length And Width From Your Tracing
Before measuring your foot length and width from the tracing, make sure your foot was flat and standing naturally during the outline process. This helps ensure accuracy. Use a ruler or tape measure to find the distance from the heel to the tip of the longest toe for precise foot length.
Next, find the widest part of your foot, usually just behind the toes, and measure across this point for foot width. Drawing straight lines at the heel, longest toe, and widest point on your tracing will help you take accurate readings.
Be sure to record these measurements in millimeters or inches because that’s important for correct shoe sizing.
Also, keep in mind that knowing your foot arch along with these dimensions is key to getting the most comfortable and best-fitting shoes.
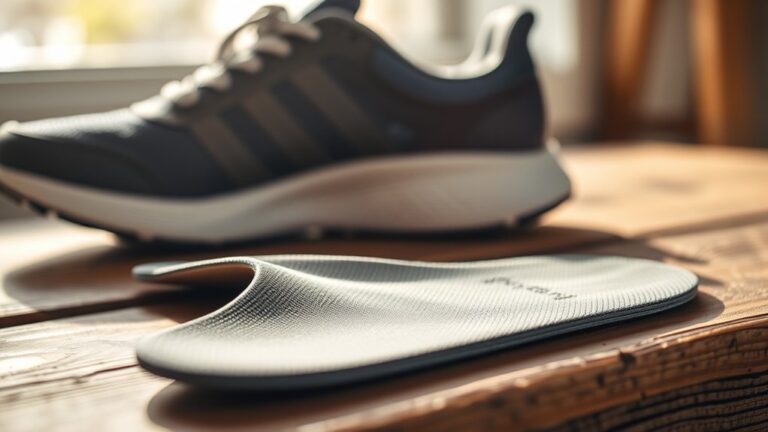
How To Determine Shoe Depth For A Better Fit
To figure out your shoe depth, begin by measuring your instep girth. Just wrap a flexible tape measure around the middle part of your foot. It’s pretty straightforward!
Knowing the differences between standard, extra, and double depth shoes can make a big difference, especially if you use braces or orthotics.
When you combine your foot length with your instep girth, you’re much more likely to find shoes that offer the comfort and space your feet really need. It’s all about getting that perfect fit!
Measuring Instep Girth
Although many people focus only on length and width when measuring their feet, checking the instep girth is really important for finding the right shoe depth.
To measure your instep girth, take a flexible tape measure and wrap it around the middle of your foot at the instep, where the arch rises.
Make sure the tape is snug but not so tight that it squeezes your foot. Then, record the measurement in inches or centimeters.
This number helps you pick shoes with enough insole depth, which matters a lot if you wear orthotics or braces.
For a good comparison, double your instep girth measurement and use shoe sizing charts that show depth requirements.
Measuring your instep girth properly means your shoes will fit comfortably and you’ll avoid discomfort from shoes that aren’t deep enough.
Depth Options Explained
How do you determine the right shoe depth to guarantee ideal comfort and fit? Start by measuring your instep girth with a flexible tape measure around the middle of your foot. This helps identify your required shoe depth.
Keep in mind that shoe material impacts flexibility and how much space your foot arch needs inside the shoe. Standard shoes offer basic depth, but extra depth shoes add 1/4 inch (6 mm), accommodating thicker socks or orthotics.
Double depth shoes provide about 1/2 inch (12 mm) more space, suitable for specialized needs.
Try on shoes with different depths or use a fitted shoe with a ruler to assess comfort. Matching the shoe depth to your foot’s dimensions prevents pressure points and guarantees unrestricted movement.
It’s all about finding that perfect fit so your feet feel great all day long.
Choosing Depth For Braces
Measuring your instep girth remains the key step when selecting the right shoe depth for braces. Use a tape measure around the middle of your foot to get this critical dimension.
Choose extra depth shoes if you need about 1/4 inch more space than traditional styles, or double depth shoes for roughly 1/2 inch extra.
Double depth shoes are ideal for accommodating braces or AFOs.
Always compare your instep measurement with the height of your orthotic or brace to guarantee orthotic compatibility.
Keep in mind that shoe material affects flexibility and fit, so select shoes made from materials that can comfortably accommodate your brace without causing pressure points.
Proper shoe depth prevents discomfort. It ensures your orthotic or brace fits securely and functions effectively inside the shoe.
Taking the time to measure and choose carefully really makes a difference.
How To Use Your Measurements To Find Your Shoe Size
Once you have your foot length and width measurements, you can input them into a reliable shoe size calculator to get accurate size recommendations.
Measure your foot length and width, then use a trusted shoe size calculator for precise recommendations.
Always use the measurements from your larger foot if there’s a discrepancy, ensuring the best fit.
Compare these results with brand-specific size charts, as sizing can vary by manufacturer.
Keep in mind that each shoe size increment equals about 1/3 inch in length, and width changes by roughly 1/8 inch.
When deciding, consider the shoe material since flexible materials may allow for a snugger fit, while rigid ones require more room.
Also, factor in fashion trends that influence shoe shapes and sizing standards.
This will help you choose a size that balances comfort and style based on your precise measurements.
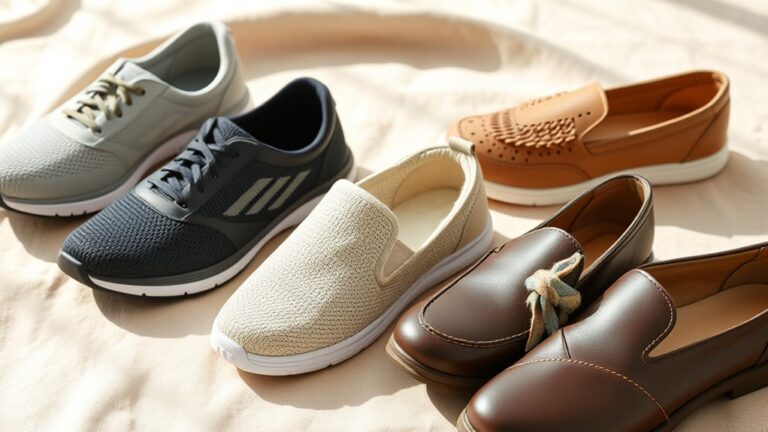
How To Choose The Right Shoe Size For Men And Women
Knowing your exact foot measurements is just the first step. Selecting the right shoe size for men and women requires careful consideration of several factors. To guarantee the best fit, follow these steps:
Measure your feet at the end of the day when they’re fullest, and record both length and width. It’s a good idea to do this because your feet tend to swell a bit as the day goes on. This way, you get the most accurate measurement.
Account for your foot arch type, as it affects comfort and support needs. Different arch types need different kinds of support, so knowing yours helps a lot.
Also, check brand-specific size charts since shoe sizes and shoe material flexibility vary widely.
Choose shoes that accommodate your larger foot measurement and foot width for an ideal fit. Sometimes one foot is bigger than the other, so it’s smart to go with the bigger size. This ensures your shoes feel comfortable and support your feet properly.
How To Check If Your Shoes Really Fit After Measuring
Although getting accurate foot measurements is essential, confirming that your shoes truly fit comes down to a few practical tests.
First, make certain there’s about a thumb’s width (around 1/2 inch) between your longest toe and the shoe’s front when standing. This space is key for shoe comfort.
Next, check that your heel stays securely inside without slipping during walking.
Assess the shoe’s width to confirm it doesn’t squeeze your foot, especially across the ball. Pay attention to any pinching or excessive movement with your toes.
Finally, test the shoes on an incline or during simulated activities to verify they support your foot arch adequately and avoid pressure points.
These steps guarantee a reliable fit after measuring your shoe size at home.
Frequently Asked Questions
How Often Should I Measure My Shoe Size for Accuracy?
You should measure your shoe size every 6 to 12 months to keep your shoe size consistent. Using reliable measurement tools helps ensure accuracy.
It’s a good idea to re-measure more often if you experience weight changes or pregnancy. Also, check your size when trying new shoe brands for the best fit.
This way, you can avoid discomfort and find shoes that really feel right. Staying on top of your measurements makes shopping easier and more enjoyable!
Can Foot Size Change With Age or Weight Fluctuations?
Though foot growth slows with age, you’ll notice weight impact can stretch tissues, causing size changes. Ligaments weaken and swelling occurs, so your foot size can shift, requiring regular checks for accurate shoe fitting.
It’s pretty common to see your feet change over time, especially if your weight goes up or down. So, keep an eye on your foot size now and then to make sure your shoes still fit comfortably.
Are There Differences in Shoe Sizing Between Countries?
Yes, you’ll find differences in international sizing between countries. You should always use conversion charts when buying shoes abroad. U.S., UK, and European sizes vary considerably, affecting fit and comfort.
How Do Insoles or Orthotics Affect Shoe Size Selection?
Insole compression can add up to 1/2 inch inside your shoe, so you need to measure with orthotics to guarantee a proper orthotic fit. This prevents tightness and discomfort, ensuring your shoes feel comfortable all day.
It’s a good idea to try your shoes on with the insoles or orthotics in place. That way, you know exactly how much extra space you need. Otherwise, you might end up with shoes that feel too snug.
What if My Feet Are Two Different Sizes?
If you have foot asymmetry, always size for your larger foot to guarantee sizing consistency and comfort. Consider adjustable or custom shoes if the difference is significant. This helps prevent discomfort and keeps a proper fit across both feet.
It’s all about making sure your shoes feel good and support you well, even if your feet aren’t exactly the same size. Don’t hesitate to explore options that work best for you!
Conclusion
By accurately measuring your foot at home, you can avoid the common mistake of buying shoes that don’t fit right. Did you know that nearly 60% of people wear the wrong size? Taking the time to trace your foot and measure its length, width, and depth ensures a comfortable fit made just for you.
Use your measurements with confidence to pick the right shoe size, whether for men or women. And remember, it’s always a good idea to double-check the fit once you try them on. This simple process can save you time, money, and a lot of discomfort.