How To Install Shoe Molding – Step By Step Guide
To install shoe molding, start by selecting the right style and material that matches your baseboards. Measure your room perimeter accurately, adding extra length for cuts.
Cut inside corners with coping or 45° miters for outside corners. Sand and prime the molding before fitting each piece slightly long. Then attach with nails and adhesive spaced evenly for a strong hold.
Fill gaps and nail holes, then finish with paint or stain for a seamless look. Follow these steps to master precise and durable installation techniques. It’s easier than you might think once you get the hang of it!
Key Takeaways
- Measure the room perimeter accurately, including corners, and add 10% extra for cuts and adjustments.
- Cut molding pieces precisely with appropriate miter or coping joints for inside and outside corners.
- Sand, prime, and finish molding before installation for a smooth, durable surface.
- Attach molding using both adhesive and finishing nails spaced 12–18 inches apart for a secure fit.
- Fill nail holes and gaps with wood filler or caulk, then sand and paint or stain for a polished look.
Choose the Right Type of Shoe Molding
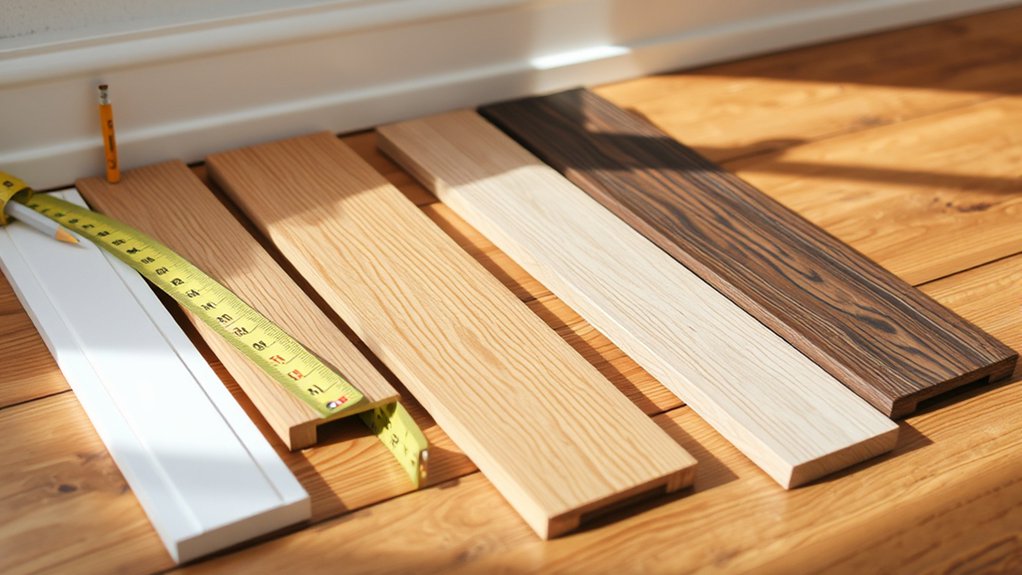
How do you guarantee your shoe molding complements your room perfectly? Start by focusing on style matching. Select a profile like quarter-round or traditional that aligns with your existing trim’s design and finish.
For material options, consider primed pine, MDF, oak, or polystyrene. Weigh factors like durability, budget, and appearance. Decide whether prefinished molding suits your timeline for quick installation or if unfinished molding is better so you can stain or paint for a custom look.
If you plan to stain, match the wood species of the shoe molding to your baseboards. This will help ensure a seamless finish.
Measure Your Space and Calculate Shoe Molding Needed
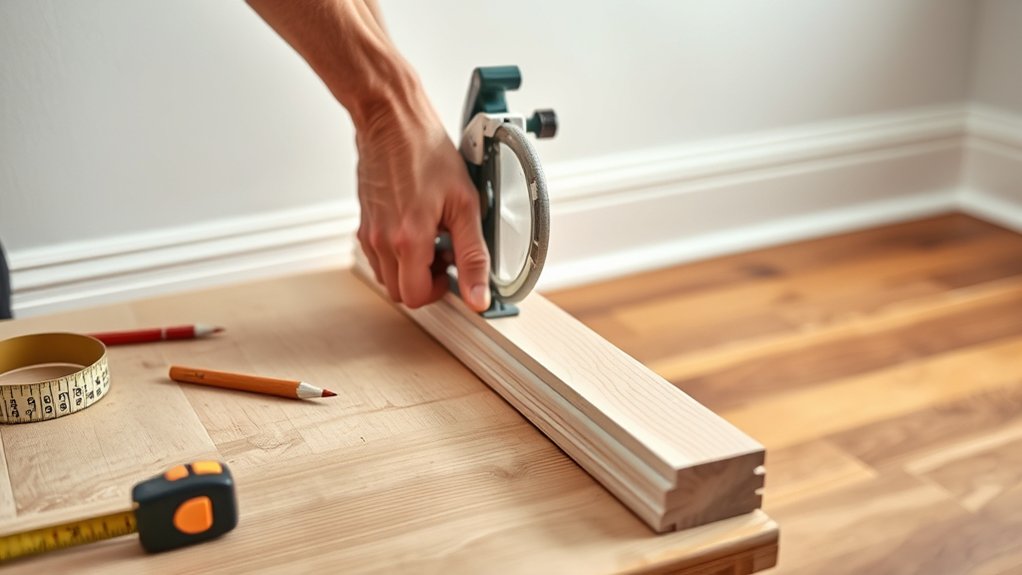
After selecting the appropriate shoe molding style and material, the next step is to measure your room accurately to determine how much molding you’ll need. Start by measuring the total perimeter of the room, including all walls, doorways, and cabinets, using reliable measurement tools like a tape measure and pencil.
Make sure to measure each wall individually, especially if lengths vary. This helps guarantee accuracy. And don’t forget to include any corners or irregular surfaces in your calculation.
Once you have the total length, add an extra 10% to accommodate cuts, errors, and fitting adjustments. Mark your measurements clearly on the molding before cutting.
Using accurate measurement techniques and the right tools will save you time and materials throughout the installation.
Make Essential Cuts: Inside, Outside, Scarf & Butt Joints
You’ll start by making precise cuts for inside and outside corners. Using 45-degree angles helps guarantee tight fits.
Then, you’ll learn how to create scarf joints by beveling edges. This makes for seamless changeovers.
After that, you’ll work on butt joints, which involve joining pieces end-to-end at 90 degrees.
Inside Corner Techniques
When fitting shoe molding at inside corners, you need to cut one piece at a 90-degree angle and the adjoining piece at 45 degrees to achieve a proper fit. This corner joint relies on precise miter cutting to create a seamless transition.
To ensure accuracy and a professional finish, start by measuring the inside corner carefully. Cut the first piece slightly longer to allow for adjustments.
Then, use a coping saw or Dremel tool to cope the end of the adjoining piece, shaping it to fit tightly around the corner.
Make sure to test fit both pieces before nailing them in place. Adjust as needed to get a gap-free joint. Taking your time here really pays off!
Outside Corner Cuts
Although outside corners present more visible joints, cutting each piece at a 45-degree miter angle guarantees a seamless fit. Begin by setting your miter saw to precisely 45 degrees to execute accurate corner mitering cuts.
Cut each shoe molding piece slightly longer than the measured length to allow for fine trimming.
Next, fit the mitered pieces together on the outside corner and mark any excess for precise joint fitting. Trim carefully to achieve a tight, gap-free connection.
Apply wood glue to the mitered edges and clamp firmly until the adhesive sets, ensuring a durable bond.
Finally, inspect the joint, fill any minor gaps with caulk or wood filler, and sand smooth to create a polished, professional exterior corner finish. It’s all about those little details that make your work look top-notch.
Scarf And Butt Joints
Since longer runs of shoe molding require smooth shifts, mastering scarf and butt joints is essential for a professional finish. Scarf joints use beveled cuts to overlap pieces, creating a seamless look. This technique is ideal for decorative options and works well with various material choices.
Butt joints are simpler, made with 90-degree end-to-end cuts. They often need caulking to achieve a polished appearance.
Focus on these key steps:
- Cut scarf joints at matching bevel angles for a tight, continuous fit.
- Make sure butt joints meet cleanly. Then, fill any gaps with suitable filler to keep things durable.
- Choose adhesives and fillers that work well with your material to maintain both strength and looks.
Sand, Paint, and Stain Your Molding Before Installing
Before installing your shoe molding, you’ll want to sand it thoroughly with 150-grit sandpaper to smooth any rough edges and prepare the surface for finishing. This step is essential, especially if your molding features decorative patterns or historical styles, as sanding ensures clean detail preservation.
If you’re painting, apply a primer to promote adhesion and achieve an even coat.
For stained finishes, use a stain marker or wood stain to enhance the natural wood grain and match existing trim.
After painting or staining, seal the molding with a clear polyurethane coat to protect the finish and improve durability.
Make sure to allow each coat to dry completely before moving on or installing to avoid smudges or damage.
Proper sanding and finishing beforehand really guarantee a professional, long-lasting result.
Fit and Test Each Piece for a Perfect No-Gap Installation
When installing shoe molding, you’ll want to measure and cut each piece slightly longer than the required length. This gives you some room for precise adjustments. It helps make sure your molding fits perfectly without any gaps.
Use your installation tools to test fit each piece by pressing it firmly against the wall and baseboard. Check the alignment with a level or straightedge to spot any uneven edges. If you notice gaps, trim or sand the edges carefully.
Keep repeating the fitting process until the fit is seamless. Just follow these simple steps:
- Test fit each molding piece, noting any misalignment or gaps.
- Make small adjustments by trimming or sanding edges for a flush fit.
- Refit and verify alignment repeatedly until the molding sits perfectly with no visible gaps.
Secure Shoe Molding With Nails and Adhesive
You’ll want to space finishing nails about 12 to 18 inches apart. When you drive them into the baseboard, do it at a slight angle to avoid splitting the wood.
Before nailing, it’s a good idea to apply a thin bead of adhesive to the back of each piece. This helps keep everything nice and stable.
Once the nails are in, make sure the nail heads are set just below the surface. Then, fill the holes to give your work a smooth, professional finish.
Nail Placement Tips
Although securing shoe molding with adhesive provides an initial hold, properly placed nails guarantee long-term stability and prevent sagging. Nail placement is critical for durability and appearance. To assure success, follow these precise steps:
Space nails 12-18 inches apart along the molding to maintain even hold and avoid sagging. Drive nails into the baseboard, never the floor, and position nails away from ends to prevent splitting. Use a nail set to countersink nail heads just below the surface, ensuring smooth filling and painting.
For tight corners, angle the nails to secure joints firmly without damaging the wood. Pay close attention to nail depth. Too shallow won’t hold, and too deep weakens the molding. Proper nail placement ensures professional, lasting results.
Using Adhesive Effectively
Since nails provide mechanical strength, combining them with adhesive guarantees a secure, lasting hold for your shoe molding.
Select a high-quality construction adhesive suitable for wood-to-wall bonding. Apply it evenly along the back of the molding, ensuring full coverage to maximize bonding strength.
Press the molding firmly against the wall and baseboard, holding it for 30 seconds to allow the initial set.
Use painter’s tape to hold the molding temporarily while the adhesive cures fully, which usually takes 24 hours.
Be sure to wipe away any excess adhesive immediately with a damp cloth to avoid surface damage.
This careful approach to adhesive types and application ensures a durable bond. It enhances the molding’s stability before you reinforce it further with nails.
Combining Nails And Glue
When you combine nails and glue, you create a stronger, more durable bond for your shoe molding than relying on either method alone. Start by applying a suitable construction adhesive. Make sure to select glue types designed for wood and trim to get the best results.
Then, use precise nail techniques. Fasten the molding with finishing nails spaced 12-18 inches apart, driving them just below the surface for seamless finishing.
To guarantee proper setting and alignment, clamp or tape the molding temporarily after nailing.
This hybrid method offers three key benefits:
- Prevents gaps and nail pops over time
- Maintains secure adhesion on uneven surfaces
- Ensures a long-lasting, flush finish
Handle Difficult Shoe Molding on Irregular Corners and Surfaces
If you encounter irregular corners or uneven surfaces while installing shoe molding, creating small kerfs on the back of the trim can considerably increase its flexibility. This allows it to bend smoothly without cracking. You can also use flexible techniques like carefully cutting these kerfs or applying gentle heat with a heat gun or warm water to soften rigid molding for tight bends.
Make sure to measure and test-fit the molding around irregular surfaces before final nailing. This helps ensure a snug, seamless fit.
For stain-grade molding, adding extra nails or kerfs can prevent splitting during bending.
When working with painted trim, use caulk to fill gaps and conceal uneven edges caused by irregular surfaces. These practical methods really help you achieve a professional finish, even on challenging corners and uneven areas.
Fill, Sand, Paint, and Inspect Your Shoe Molding
Although the molding may look complete after installation, you’ll need to fill nail holes and gaps with wood filler or caulk that matches your finish to achieve a seamless appearance. Proper color matching during surface preparation is vital for a flawless result.
Follow these steps:
- Apply filler or caulk and let it dry fully according to manufacturer instructions.
- Sand the filled areas with 150-220 grit sandpaper until smooth and flush with the molding.
- Paint or stain with thin, even coats using a narrow brush or roller for professional coverage.
Finally, inspect the shoe molding for smoothness, even color, and secure attachment. Make any necessary touch-ups to ensure a polished, durable finish.
This attention to detail really elevates your installation quality.
Frequently Asked Questions
Can I Install Shoe Molding Without a Miter Saw?
Yes, you can install shoe molding without a miter saw by using alternative installation methods like a miter box and hand saw. For precise cuts, try using DIY shoe molding tips such as coping saws for corners and careful measuring.
It might take a bit more patience, but these tools can help you get the job done nicely. Just take your time and double-check your measurements before cutting. You’ll be surprised how well it can turn out without a fancy saw!
What Tools Do I Need Besides Nails and Adhesive?
To nail shoe molding perfectly, you’ll need a miter saw for angled cuts, a tape measure, combination square, and a utility knife.
Use finishing screws for durability, and choose your paint finish wisely for a polished, professional look. It really makes a difference in the final result.
How Do I Remove Old Shoe Molding Without Damaging Walls?
You’ll protect the wall by carefully prying the molding with a putty knife. Work slowly to avoid damage.
Remove nails gently, taking your time so you don’t harm the wall.
Then, clean the surface for paint touch-up. This way, you’ll keep the wall safe throughout the whole process.
Can Shoe Molding Be Installed Over Carpet Edges?
Yes, you can install shoe molding over carpet edges to achieve a clean carpet fade and edge finishing. Use longer nails or adhesives to secure molding flush against the wall and carpet. This helps ensure a snug, seamless fit.
It’s a simple way to give your room a polished look without much hassle. Plus, it hides any uneven carpet edges nicely. Just take your time to get everything aligned properly.
How Long Does Shoe Molding Installation Typically Take?
Installation timing typically ranges from 2 to 4 hours, depending on room complexity and your experience.
For efficient project planning, allocate 30-60 minutes for measuring and cutting, plus 1-2 hours for nailing and finishing adjustments.
It’s a good idea to give yourself some extra time if it’s your first go at it. That way, you won’t feel rushed and can take your time to get everything just right.
Conclusion
Installing shoe molding is like fitting the final puzzle piece. It ties your room together seamlessly. By choosing the right type, measuring accurately, making precise cuts, and securing each piece properly, you guarantee a flawless finish.
Don’t rush the sanding, painting, or filling steps. They’re vital for a professional look. With patience and attention to detail, your shoe molding will not only hide gaps but also elevate your space with clean, crisp lines.