How To Shoe A Horse – Step By Step Guide
To shoe a horse, first securely lift and clean the hoof. Remove old shoes by loosening clinches and pulling nails carefully to avoid damage.
Measure the hoof and select the right shoe. Then heat and shape it to fit precisely without touching the sole or frog.
Nail the shoe in with angled nails, clinch, and rasp for a secure, balanced fit. Make sure to use proper tools and stay safe throughout.
Keep following for detailed techniques and maintenance tips.
Key Takeaways
- Securely lift and clean the hoof, removing debris and trimming the sole for a balanced, even surface before shoeing.
- Carefully remove old shoes by loosening clinches, pulling shoes straight down, and clearing nails without damaging the hoof wall.
- Measure the hoof accurately, select the right shoe type, and heat-shape it to fit the hoof contours perfectly.
- Nail the shoe starting at the front corners, clinch nails tightly, and rasp edges flush for comfort and secure attachment.
- Perform final checks for fit, balance, and comfort, maintaining sharp tools and safety gear throughout the process.
Prepare the Horse’s Hoof Before Shoeing
Before you begin shoeing, you need to prepare the horse’s hoof carefully to make sure the shoe fits properly and to avoid injury. Start by lifting the hoof securely, supporting the limb while tucking the hip against the hock. This helps you maintain control and shows respect for the horse’s behavior, which minimizes stress.
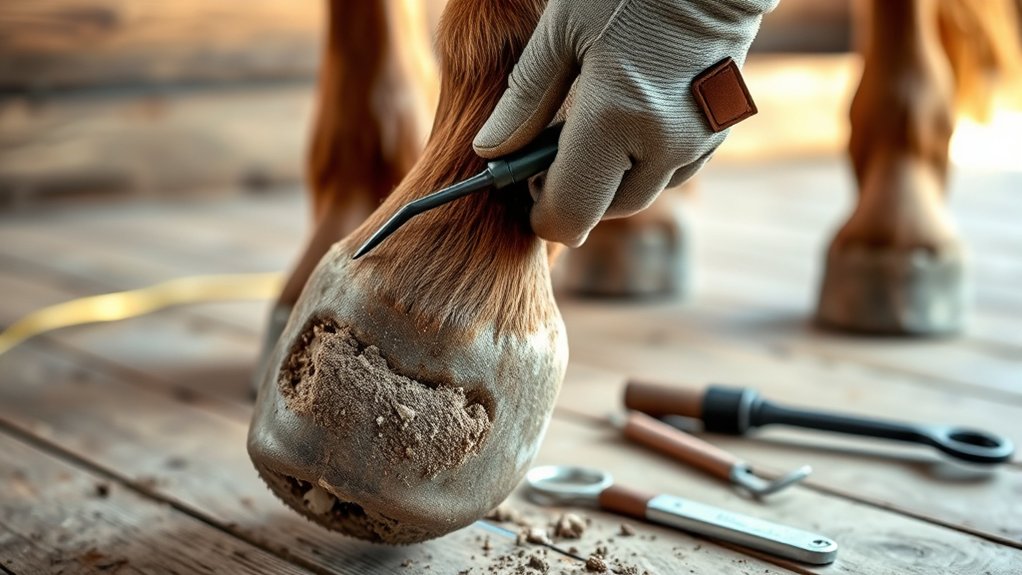
It really helps to be familiar with hoof anatomy so you can identify the sole, frog, and wall. These are essential for precise trimming. Use a hoof pick and wire brush to remove all debris like dirt, mud, rocks, and manure from the entire hoof surface.
Next, carefully trim any flaky sole with a hoof knife, but be careful to avoid deep cuts that might cause pain.
Finally, level and smooth the bottom of the hoof with a rasp to get rid of high spots and ensure an even surface. This sets a solid foundation for the shoe to fit properly.
Remove Old Shoes Safely and Effectively
First, make sure to clean the hoof thoroughly to get rid of any dirt and debris before you start. This will give you a clear view and make the process easier.
Next, grab a clinch cutter and a hammer to gently loosen the clinches. Be careful with this step to avoid hurting the hoof.
Once the clinches are loose, pull the old shoe straight down. This helps prevent any damage to the hoof.
Finally, use nippers to remove any leftover nails or shoe fragments. Just take your time and make sure the hoof wall stays intact throughout.
Removing Nails and Clinches
When removing old shoes, you’ll need to extract the nails carefully using nail-pullers or end cutters to protect the hoof wall from damage. Nail removal techniques involve gently prying the nails away from the hoof with end cutters before fully pulling them out. This approach minimizes stress on the hoof structure.
After removing the nails, clip or bend any protruding tips outward to prevent injury. For clinch removal, use a clinch block or clincher tool to straighten or loosen the bent nail points secured over the hoof wall. Proper clincher tool usage guarantees nails release cleanly without tearing the hoof.
Always confirm nails were initially driven straight and outward to facilitate safe removal and avoid penetrating sensitive tissues beneath the hoof. It’s important to take your time with this part to keep the hoof healthy and pain-free.
Cleaning Hoof Before Removal
After carefully removing nails and clinches, focus on cleaning the hoof thoroughly to guarantee a safe and efficient shoe removal. Begin hoof cleaning with a hoof pick to clear away dirt, manure, and embedded debris.
Pay close attention to removing all loose mud, rocks, and foreign material that could obstruct your tools or hide nails and clinches.
Use a wire brush to scrub the hoof wall and sole, enhancing visibility and access to the fasteners. Effective debris removal minimizes the risk of slipping and ensures better control during shoe extraction.
Make sure the hoof is completely dry before proceeding, as moisture can compromise grip and safety.
Thorough hoof cleaning sets the foundation for a precise, damage-free removal of old shoes. Taking the time to do this right really pays off in the end!
Choose the Right Horseshoe Size and Type
Although selecting the correct horseshoe size and type requires careful attention, it’s essential for the horse’s comfort and performance. Start by taking an accurate hoof measurement, focusing on the width to guarantee proper shoe sizing. Use a reliable sizing chart to match the hoof measurement precisely.
Keep in mind that front and hind shoes often differ because front shoes are generally larger.
Next, select the shoe type based on the horse’s activity and hoof condition. Steel and aluminum are common options, while glue-on shoes suit specific needs.
Always choose shoes that cover the hoof’s buttresses fully, allowing room for natural expansion without contacting the sole. This precise approach prevents discomfort and potential injury. It also ensures maximum support and durability during use.
Shape and Adjust the Horseshoe to Fit the Hoof
Selecting the right horseshoe size and type sets the foundation, but shaping and adjusting the shoe to fit the hoof’s unique contours guarantees ideal performance and comfort.
Begin horseshoe shaping by heating the shoe until red-hot, then carefully bending or hammering it on an anvil to mirror the hoof’s natural curves. Focus on hoof contour matching by adjusting the toe, heels, and quarters individually. This ensures the shoe aligns precisely with the hoof wall and white line.
Use a rasp or grinding machine to fine-tune the fit, making sure the shoe covers the hoof’s buttresses while leaving space for expansion and growth. Always fit the shoe to the hoof before nailing.
Make small modifications as needed to secure a snug, balanced, and comfortable fit.
Position and Nail the Horseshoe Correctly
Start by aligning the shoe so the toe is centered and flush with the hoof wall. This helps guarantee a proper fit.
Then, drive the first nails into the outside front corners of the second holes from the toe.
After that, insert the rest at a slight outward angle to protect the tissue.
Finally, bend, trim, and clinch the nail tips securely. This will keep the shoe firmly in place without causing injury.
Align Shoe Properly
When you position the horseshoe, guarantee its toe aligns exactly with the hoof’s toe and that it sits flush against the hoof wall on all sides. Proper shoe alignment and hoof centering are critical to avoid discomfort and ensure durability. Follow these steps:
- Verify the nail holes correspond precisely with the white line to prevent nail protrusion into sensitive tissue.
- Fit the shoe so it covers the buttresses without impinging on the frog or sole, maintaining clearance.
- Check lateral and medial alignment by evaluating straightness from heel to toe visually or with a measuring line.
- Adjust the shoe’s position as needed to guarantee it’s centered and level before proceeding.
This precise alignment prevents biomechanical imbalances and prepares the shoe for secure nailing. It really makes a difference in how comfortable and stable the shoe will be.
Secure Nails Effectively
Although positioning the shoe correctly is essential, securing it with nails demands equal precision to guarantee stability and comfort.
Begin nail placement by driving the first nail into the outside front corner of the second hole from the toe on each side of the shoe. Insert nails at an outward angle through the white line of the hoof wall to avoid damaging sensitive tissue.
Leave about ½ to ¾ inch of nail protruding above the hoof wall to allow for effective clinching.
Use a clinch block or clincher tool to bend the nail points outward, creating a proper clinch that prevents the nail from pulling out.
This clinch technique ensures a tight, secure fit, maintaining the shoe’s position without compromising hoof integrity or the horse’s comfort. It really helps keep everything in place and the horse happy.
Secure Nails and Clinch for a Strong Hold
To guarantee a strong hold, drive the nails into the white line at an outward angle. This protects sensitive tissue while securing the shoe firmly. Proper nail placement is critical to avoid injury and assure durability.
Drive nails into the white line at an outward angle to protect tissue and ensure a secure hold.
After driving the nails, leave about ½ to ¾ inch protruding above the hoof wall for clinching.
Follow these steps for effective clinching techniques:
- Bend the nail tips outward to prevent them from piercing sensitive tissue.
- Use a clinch block or clincher tool to fold the nail tips tightly over the hoof wall.
- Make sure the clinch is snug to avoid loosening during movement.
- Rasp or cut the clinched nail tips flush with the hoof wall to prevent snagging.
These steps create a secure, stable hold that’s essential for proper shoeing. It’s really about making sure everything stays in place without causing harm.
Check the Fit and Balance After Shoeing
After securing the nails and clinching the shoe, you should immediately verify that the hoof and shoe align correctly with the natural hoof angle. Check the shoe fit carefully: it must cover the buttresses snugly without gaps or overhangs. Confirm nail clinches are flush and bent properly to avoid discomfort.
Make sure the shoe doesn’t contact the sole or frog, so there’s room for the hoof to expand. Perform a final visual inspection and rasp any rough edges to optimize balance.
| Aspect | What to Check | Result |
|---|---|---|
| Hoof Alignment | Shoe matches natural hoof angle | Proper weight distribution |
| Shoe Fit | No gaps or overhangs | Secure shoe, no rubbing |
| Nail Clinches | Bent flush, no protrusions | Comfort, no injury risk |
| Sole Clearance | No contact with sole or frog | Allows hoof expansion |
| Final Inspection | Smooth edges, balanced shoe | Optimal comfort and function |
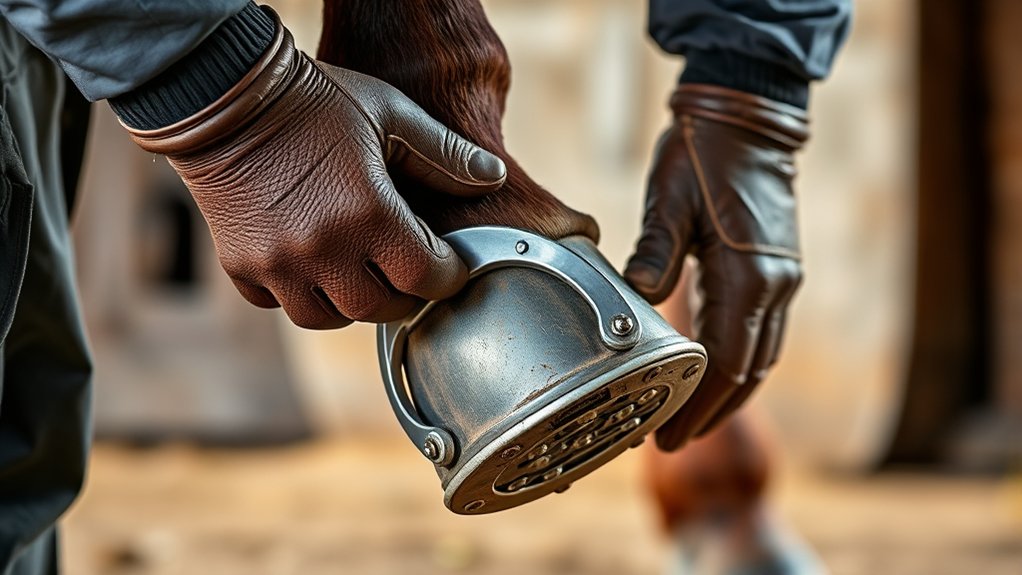
Use Essential Tools and Follow Safety Tips
Ensuring the proper fit and balance of the shoe sets the stage for safe and effective work with your tools. To shoe a horse efficiently, stick to these essential steps:
First, use sharp, well-maintained tools like hoof knives, nippers, and clinch cutters. Keeping your tools in good shape is key for precision and safety.
Start with sharp, well-maintained tools like hoof knives and nippers for precise and safe horse shoeing.
Always wear protective gear, including gloves and safety glasses. These basics help protect you from flying debris and accidental slips.
Store tools properly in a toolbox to prevent dulling, rusting, or damage. This way, they stay effective over time.
Use each tool for its specific task—rasps for shaping, clinch cutters for clinch removal.
Also, keep full control of the horse and your surroundings to avoid accidents.
Following these guidelines makes the shoeing process safe and precise every time.
Maintain Hoof Health and Shoe Condition
How often do you inspect your horse’s hooves to catch issues like cracks, thrush, or uneven wear? Regular hoof care is essential to maintain the best possible health and prevent lameness.
Always clean the hooves thoroughly with a hoof pick and wire brush before shoeing or hoof trimming to remove dirt, manure, and debris.
During hoof trimming, use a sharp hoof knife and rasp to carefully balance and level the hoof. Be sure to avoid deep cuts or over-trimming since that can cause pain.
It’s also important to regularly trim excess sole to promote proper weight distribution.
Replace horseshoes every 4 to 8 weeks, and keep a close eye on the hoof condition. This helps guarantee the shoes stay secure and don’t interfere with hoof integrity.
Consistent maintenance assures your horse’s comfort and soundness.
Frequently Asked Questions
How Often Should a Horse Be Reshod?
You should reshoe your horse every 4 to 8 weeks to guarantee ideal horse health. Regular shoe maintenance prevents hoof imbalance, discomfort, and lameness. This helps keep your horse sound and performing well.
Keep an eye on wear closely for the best results. It’s all about staying ahead of any issues before they become a problem. That way, your horse stays happy and healthy.
Can Horses Be Shod Barefoot in Certain Conditions?
You can choose barefoot trimming, you can support hoof health, you can promote natural flexibility. When hooves are strong and well-maintained, barefoot shoeing suits certain horses.
But you have to monitor closely and trim properly for the best results. It’s all about keeping an eye on how the hooves respond. With the right care, going barefoot can really work well.
What Are Signs of Discomfort After Shoeing?
You’ll notice horse behavior changes like persistent pawing, reluctance to move, or kicking at the limb. Pain indicators include limping, swelling, heat around the hoof, sensitivity when touched, and resistance to foot handling.
These signs usually mean the shoeing process caused discomfort or injury. If you see any of these, it’s a good idea to check the horse’s hooves carefully or call a vet. Horses can’t tell us when they hurt, so watching their behavior is key.
How to Handle a Horse That Resists Shoeing?
Since 70% of horses display varying temperaments, you must tailor restraining techniques accordingly. Use firm, gentle holds and gradual desensitization to manage resistance. This helps ensure safety while respecting the horse’s temperament.
Doing this makes shoeing sessions go more smoothly. It’s all about patience and understanding how your horse reacts. Keep things calm and steady to build trust over time.
Are There Alternative Materials to Traditional Steel Shoes?
Yes, you can use alternative materials like aluminum, rubber, plastic, or composite shoes. These options offer varied flexibility, shock absorption, and weight benefits.
It’s important to consider hoof compatibility carefully. Different horses might need different types depending on their specific needs. So, choosing the right material can make a big difference!
Conclusion
Shoeing a horse correctly is essential for its performance and hoof health. Did you know that improper shoeing can cause up to 60% of lameness issues in horses? By preparing the hoof, choosing the right shoe, and securing it properly, you’ll guarantee durability and comfort.
Always check the fit and balance after nailing, and maintain regular hoof care. Following these precise steps helps keep your horse sound and ready for any activity. It’s really all about giving your horse the best chance to stay healthy and happy.