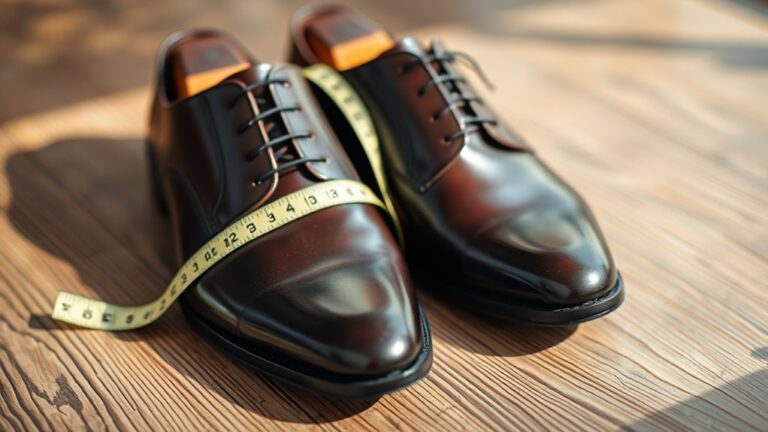
How To Use Shoe Polish – Application Tips And Guide
Start by cleaning your shoes with a horsehair brush to remove dirt. Then apply a matching or neutral wax or cream polish using a soft cloth in gentle, circular motions. Let the polish set for 10-20 minutes before buffing briskly with a horsehair brush for a smooth finish.
For extra shine, add a thin polish or water layer before buffing. Proper preparation and layered buffing guarantee durable protection and a brilliant look.
Explore further for advanced care tips and leather-specific techniques.
Key Takeaways
- Clean shoes with a horsehair brush and leather cleaner before applying polish to ensure a smooth, dirt-free surface.
- Choose wax-based polish for shine and water resistance, cream polish for conditioning and color restoration.
- Apply polish in small amounts with a soft cloth using gentle circular motions, focusing on high-wear areas.
- Let polish dry for 10-20 minutes, then buff with a horsehair brush or soft cloth for an even, glossy finish.
- For a mirror shine, add a thin water layer before buffing and reapply wax polish on toe and heel for extra protection.
Gather Essential Shoe Polish Tools
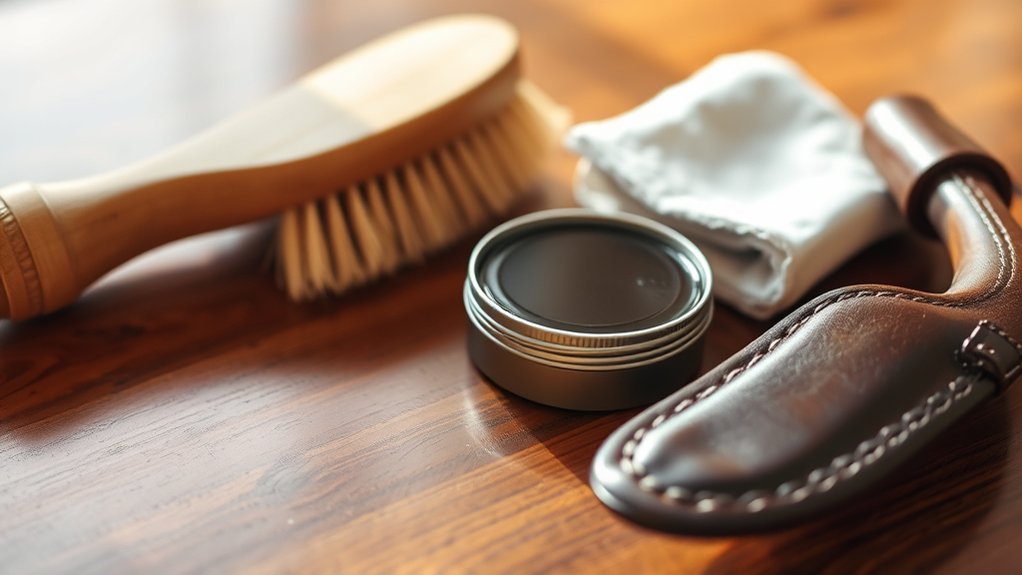
Before you start polishing, gather the essential tools to guarantee a flawless finish. Begin with a high-quality horsehair brush designed for shoe cleaning. It effectively removes dirt and dust without damaging leather.
Have soft, lint-free cloths ready. They’re indispensable for applying leather conditioning products and shoe polish smoothly. Keep cotton cloths or old T-shirt squares handy to evenly spread polish and condition leather without scratching.
Select a leather cleaner tailored to your shoe’s material to maintain its integrity prior to polishing. When choosing polish, opt for a wax-based formula that matches your shoe color to ensure a consistent, glossy finish.
Equipping yourself with these precise tools lets you maintain your leather shoes expertly, preparing them for excellent shine and longevity.
Prepare Your Leather Shoes for Polishing
Once you remove the shoelaces and shoe trees, you can thoroughly clean every part of the shoe upper. Begin by using a horsehair brush to gently remove surface dirt and dust.
Next, lightly dampen a soft cloth with water and wipe the leather to lift embedded grime.
For stubborn stains, apply a leather cleaner or saddle soap with a cotton flannel cloth, working in circular motions.
Allow your shoes to dry completely before moving on to leather conditioning. This step is vital for maintaining suppleness and preventing cracking.
Proper preparation ensures polish adheres evenly and lasts longer.
Finally, remember shoe storage tips: store shoes in a cool, dry place with shoe trees inserted to preserve shape and prolong quality after polishing.
Choose the Best Shoe Polish for Your Leather
To get the best results, go for a shoe polish that closely matches your leather’s color. If you’re not sure, a neutral polish is a safe bet.
Wax-based polishes are great when you want a high-gloss finish, while cream polishes work well if you need to condition your shoes and bring back their color.
Also, keep in mind the type of leather you’re dealing with—smooth, suede, and nubuck all need different products to keep them looking their best.
Types Of Shoe Polish
Although choosing the right shoe polish can seem straightforward, selecting one that matches your leather type and desired finish guarantees ideal care and appearance. Different polishes serve distinct purposes, impacting leather restoration and polish longevity.
Consider these types:
- Cream polish nourishes and moisturizes leather, restoring color and flexibility while providing a moderate shine. It’s perfect for maintaining softness and extending polish longevity.
- Wax-based polish delivers a high-gloss finish with superior water resistance. This type is ideal for dress shoes needing protection and a mirror-like shine.
- Neutral or colorless polishes offer versatility by conditioning various leather shades without altering their color. They help support consistent leather restoration.
Understanding these types helps you choose the most suitable product to maintain your leather’s condition and achieve your desired aesthetic with precision. It really makes a difference when you pick the right one.
Matching Polish Shades
Selecting the right type of shoe polish sets the foundation, but matching the polish shade to your leather guarantees a flawless, professional finish. Accurate color matching is essential. Use lighter shades for scuffs and darker tones for deep scratches to maintain a seamless, natural look.
When uncertain, opt for neutral or colorless polish. This enhances shine without altering the shoe’s original color. Always test your shade selection on a hidden area to confirm compatibility.
For older, faded shoes, choose a slightly darker polish to restore richness. Lighter shades work best for minor touch-ups.
Also, consider leather type and finish. Matte, high-gloss, and patent leather each respond differently to polish shades, so precise shade selection is crucial for ideal results.
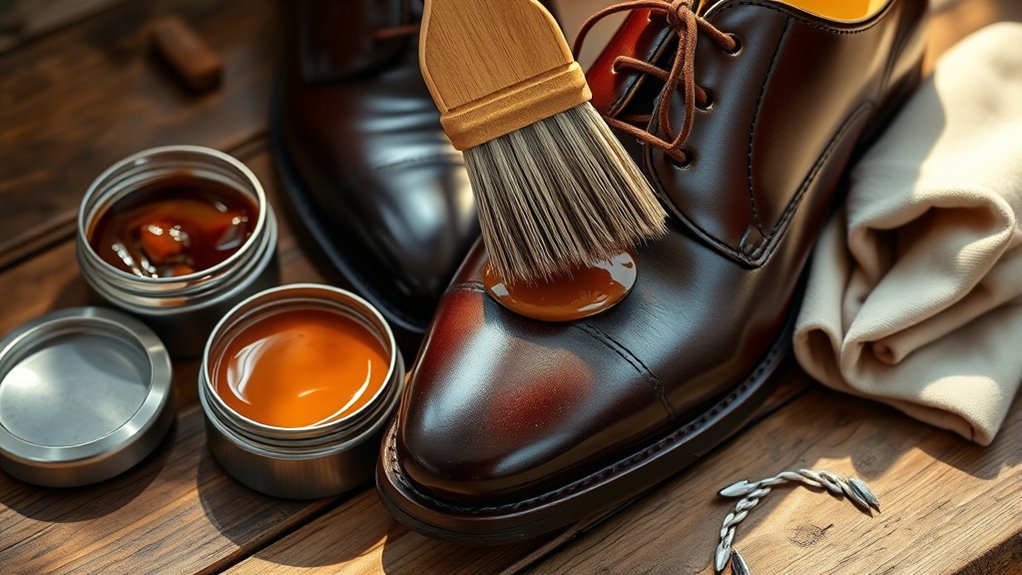
Apply Shoe Polish Step-by-Step
Before you start applying the polish, make sure your shoes are clean and dry. This helps the polish absorb evenly, giving you the best results.
Next, grab a soft cloth or an applicator brush and pick up just a small amount of polish. Then, use gentle, circular motions to work it into the leather.
Pay extra attention to the high-wear spots like the toe and heel—they usually need a bit more care.
Once you’ve covered those areas, let the polish sit for a while before you buff it out. This way, you’ll get a smooth, shiny finish that really stands out.
Preparing Shoes Properly
Once you’re ready to polish your shoes, start by removing the shoelaces and shoe trees. This way, you get full access to every part of the leather. Proper shoe preparation is key for effective shoe storage and leather conditioning. So, follow these steps carefully:
First, use a horsehair brush to remove surface dirt and dust from the entire upper. Make sure no debris gets in the way of polishing.
Next, lightly dampen a soft cloth with water and wipe down the shoes. This helps get rid of any leftover grime without soaking the leather.
If you spot stubborn stains, go ahead and apply some leather cleaner or saddle soap.
Then, let the shoes dry completely before you move on to conditioning them.
Doing this preparation right preserves your shoes’ integrity. It also makes the polish work better, keeping your shoes looking great and lasting longer while in storage.
Applying Polish Techniques
Although proper preparation sets the foundation, applying shoe polish correctly is essential for achieving a durable, polished finish. Start by using a soft cloth or applicator to spread a small, even layer of polish in circular motions over the entire shoe.
For the toe and heel, apply a slightly thicker coat to boost shine and protection.
Let the polish dry for 10 to 20 minutes before buffing with a horsehair brush or soft cloth, using brisk side-to-side strokes for maximum gloss.
For a mirror-like finish, add a thin polish layer with a damp cloth and buff again.
Always store your shoe polish in a cool, dry place to maintain quality.
And remember to observe polishing safety by working in a well-ventilated area and avoiding skin contact with polish chemicals.
How to Buff Your Shoes to a Brilliant Shine
To achieve a brilliant shine on your shoes, you’ll want to use a clean horsehair brush and buff with brisk, side-to-side motions that lift and smooth the polish. After applying polish, wait at least 20 minutes for it to set properly before buffing.
Focus on creases and folds, applying gentle pressure to remove excess wax and create an even finish.
Follow this expert buffing routine:
- Use a clean brush for brisk, consistent strokes, enhancing the polish’s depth.
- For a mirror-like shine, apply a thin layer of polish or a bit of water with a soft cloth, then buff again.
- Maintain leather conditioning by regularly cleaning and polishing, and don’t neglect sole cleaning to complete your shoe care regimen.
This precise method guarantees a smooth, glossy, high-quality shine. Give it a try, and your shoes will look fantastic!
Use Wax Polish for Extra Gloss and Protection
Building on the shine you create by buffing, applying wax polish adds an extra layer of gloss and protection that really elevates your shoes’ appearance. Focus on specific areas like the toe box and heel, applying a thin, even layer to build a high-gloss finish.
Use a clean, soft cloth to buff the wax into the leather with circular motions, making sure it sticks well.
Let the wax dry completely, which usually takes about 15 to 20 minutes. After that, briskly buff with a horsehair brush to get an even better shine.
Wax polish not only boosts gloss but also protects the leather, working alongside leather conditioning.
It won’t soak into seams or creases where it might crack, so it’s a great topcoat option. This way, you keep your shoes looking elegant while also reinforcing their surface against wear and tear.
Polish New Shoes for a Lasting Shine
When you polish new shoes before their first wear, you not only enhance their leather’s natural beauty but also create a protective barrier that extends their lifespan. To guarantee ideal results and polish longevity, follow these steps:
First, select a shoe polish that matches the color of your shoes or go for a neutral shade. This helps prevent color mismatching and makes sure you get an even finish.
Next, apply a thin layer of polish in gentle circular motions using a soft cloth or applicator. Be careful not to add too much polish because excess buildup can dull the shine.
Let the polish dry for at least 20 minutes or even overnight. After that, buff thoroughly with a horsehair brush or soft cloth to reveal a smooth, mirror-like shine.
Doing it this way ensures your new shoes keep a lasting, vibrant appearance. It’s a simple step that really makes a difference!
Special Care Tips for Suede and Nubuck Shoes
Although suede and nubuck require more delicate care than smooth leather, maintaining their appearance is straightforward if you use the right tools and techniques.
Start by employing suede cleaning techniques, such as gently brushing with a long-handled suede brush against the grain to lift dirt and restore the nap. Avoid water-based cleaners or leather polish, as they can cause discoloration.
Gently brush suede against the grain to lift dirt and avoid water-based cleaners to prevent discoloration.
For nubuck stain removal or stubborn marks on suede, use a suede eraser bar to carefully erase blemishes, then brush again to revive texture.
Apply a suede protector spray from 10-12 inches away to repel water and prevent stains. Be sure to reapply periodically for ongoing protection.
Regular brushing after wear keeps your shoes looking fresh and preserves their soft, plush texture effectively. It’s an easy step that really makes a difference!
Just a little care goes a long way with these delicate materials.
Frequently Asked Questions
Can Shoe Polish Restore Faded or Cracked Leather?
You can restore faded leather’s color and shine with shoe polish. It works well to bring back that original look and make your leather items appear refreshed.
But if the leather is cracked, polish alone won’t do the trick. For cracked leather, apply a leather conditioner first during shoe cleaning. This helps moisturize the leather and improves its flexibility, which is key to preventing further damage.
How Often Should I Polish My Shoes for Best Results?
You should polish your shoes weekly using the appropriate shoe polish types for leather or suede. Proper storage also extends shine and durability, so keep them in a cool, dry place to prevent damage between polishes.
That way, your shoes stay looking sharp and last longer. Just remember, a little care goes a long way!
Is It Safe to Use Shoe Polish on Synthetic Leather?
Think about shoe polish ingredients. Would they suit synthetic leather’s plastic coating? Usually, they don’t.
For synthetic leather maintenance, avoid traditional polish to prevent damage. Instead, use specialized products designed to keep its look safe and effective. That way, your synthetic shoes stay in great shape without any risk.
Can Shoe Polish Prevent Water Damage?
Shoe polish enhances leather protection by creating a durable, water-resistant layer. It helps boost the polish’s durability and repels moisture.
That said, you’ll still need additional waterproofing products to fully prevent water damage on your leather shoes. So, while shoe polish is helpful, it’s not a complete solution on its own.
How Do I Remove Excess Polish From Shoe Seams?
Removing excess polish from seams can feel like erasing a masterpiece with a feather. Use a soft brush or a damp swab for cleaning the seams.
Then, gently buff with a dry cloth to bring back your shoe’s pristine look. It’s all about being gentle and patient. You’ll get it just right!
Conclusion
Now that you’ve mastered the art of shoe polishing, your leather shoes will gleam like polished gems. Remember, preparation is key. Clean and condition before you apply polish.
Choose the right products and follow each step carefully, from application to buffing. For extra shine, don’t hesitate to use wax polish.
Treat your shoes with care, and they’ll repay you with lasting brilliance. Every step you take will be a statement of impeccable style.